Monday, March 28, 2011

Paul Cooks!

I have the best husband!  I haven't been feeling well this past week, and haven't cooked much of anything (at least that I can blog about).  Yesterday Paul told me he was taking care of dinner -- nice!

We had a roast from Paul's two for one shopping extravaganza and he, unlike me, pulled it out of the freezer in plenty of time to defrost, and made Roast Pork with Gravy, Basmati Rice, and Mixed Green Salad with Balsamic/Garlic Dressing!  He found a recipe on E How Food -- it was delicious!  You can find the recipe here.

I'm hoping to get back on track this week -- cross your fingers!

Tuesday, March 22, 2011

Roasted Chicken with Root Vegetables

It's not often that I have a whole chicken in my freezer but several months back there was a killer sale (77 cents a pound!) so I bought a couple birds.  I roasted one of them in January following Jonathan Waxman's recipe (you can read about it here), and I defrosted the other one to prepare today.

Roasted Chicken with Root Vegetables from Recipes from the Root Cellar is your basic recipe, nothing new or exciting, but I wanted to try another roast chicken recipe to compare to my last experience.  Differences I've noticed so far?  Waxman's chicken was roasted at a much higher temperature (475 instead of 350), and also called to season the bird with salt, pepper and oil.  The recipe I'm following today just called for a few garlic cloves and 1 teaspoon of the rosemary to be put in the cavity of the chicken, but I couldn't help myself and I rubbed the outside with olive oil, salt and pepper.  The other major difference?  Smoke alarm didn't go off once!  So which one did I prefer?  I loved them both!

The chicken was so moist and tender that Paul barely had to use a knife to carve it -- the meat just fell off the bone.  For the veggies I used what I had on hand:  carrots, turnips, potatoes, onions, and I chopped up a couple celery for flavor.  I was afraid they might overcook (since they were in the oven with the chicken for almost two hours) but they were perfectly done, and so delicious I gobbled it up before I remembered the gravy!

Recipes from the Root Cellar: 270 Fresh Ways to Enjoy Winter VegetablesRoasted Chicken with Root Vegetables
Recipes from the Root Cellar
Yield:  Serves 4 to 6

1 whole roasting chicken (3 1/2 to 5 pounds), neck and giblets removed
1 whole garlic head, cloves separated and peeled
2 tsp crushed dried rosemary or sage
8 cups peeled and cubed mixed root vegetables (beets, carrots, celery root, parsnips, rutabagas, salsify, and/or turnips)
1 to 2 onions, cut into wedges
2 tbsp sunflower, canola, or extra virgin olive oil
Salt and freshly ground black pepper
3 cups chicken broth
3 tbsp all-purpose flour
2 tbsp water or dry white wine

Preheat the oven to 350.

     Rinse the chicken under cold running water and pat dry.  Set in a large roasting pan.  (The pan must be large enough to hold the vegetables in a single layer surrounding the chicken.)  Insert a few garlic cloves and 1 tsp of the rosemary in the cavity of the chicken.
     Combine the root vegetables and onions in a large bowl.  Add the remaining garlic cloves to the vegetables, along with the remaining 1 tsp rosemary.  Add the oil, season with salt and pepper, and toss to coat.  Arrange the vegetables in a single layer around the chicken.
     Roast for 1 1/2 to 2 hours (20 to 25 minutes per pound), until the juices run clear from the chicken, a leg moves easily, and an instant read thermometer inserted into the thickest part of the thigh reads 165.  Stir the vegetables once or twice during the roasting to promote even cooking and to baste the vegetables.
     Transfer the chicken to a serving platter and keep warm under a tent of foil.  Spoon the vegetables into a serving bowl and cover to keep warm.
     To make a gravy, place the roasting pan over one or two burners on medium high heat.  Add the broth and stir to deglaze the pan, bringing the broth to a boil.  In a small bowl, combine the flour and water, mixing until completely smooth; stir into the boiling pan juices.  taste and add salt and pepper, if needed.
     Carve the chicken and serve with the gravy, passing the vegetables separately.

Monday, March 21, 2011

Meatless Monday: Black Beans and Rice with Fire Roasted Vegetables

Beans and Rice pretty boring, right?  Yup, that's what I thought before I tried Black Beans and Rice with Fire Roasted Vegetables from The Roasted Vegetable.  It's the roasted veggies that really make this dish.  Sweet, tender with a bit of a zip thanks to the chipotles in adobe sauce.  It's well known amongst my friends that I do not have much tolerance when it comes to chilies.  This meal had enough spice to keep my tongue tingling, and still add a little heat and zip for Paul and Kevin.

Make sure you allow yourself enough time to prepare this dish -- it took close to two hours to prepare.  If you're pressed for time the book says you can substitute of a 19 ounce can of black beans for the dried ones, rinse well and drain, and season with ground cumin.

The Roasted VegetableBlack Beans and Rice with Fire-Roasted Vegetables
The Roasted Vegetable
Yield:  Serves 4

Beans
1 cup dried black beans, rinsed, picked over, and soaked overnight in water to cover
4 cups water
2 tsp ground cumin
1 tsp salt

Vegetables
1 medium size red bell pepper, cut into matchsticks
1 medium size green bell pepper, cut into matchsticks
1 small to medium size zucchini, cut into matchsticks
1 medium size onion, halved and slivered
1 cup fresh or frozen corn kernels
3 tbsp extra virgin olive oil
1 to 2 tsp minced chipotles in adobo sauce
1 tsp ground cumin
Salt and freshly ground black pepper

1/2 cup homemade or store-bought salsa, or more to taste
Hot cooked white or brown rice (I used brown cooked in vegetable stock)
Sour cream

     Drain the beans.  In a medium size saucepan, combine the beans, water, cumin, and salt.  Bring to a boil, then reduce the heat and simmer, partially covered, until the beans are tender, about 1 hour.
     While the beans cook, preheat the oven to 425.  Lightly oil a large shallow roasting pan or half sheet pan.
     To make the vegetables, in a large bowl combine the bell peppers, zucchini, onion, and corn.  In a small bowl combine the oil, chipotles, and cumin.  Pour over the vegetables and toss to coat.  Season with salt and pepper to taste.  Arrange in a single layer in the pan.
     Roast for about 35 minutes, until the vegetables are tender and lightly browned, stirring or shaking the pan occasionally for even cooking.
     When the beans are tender, drain off the excess water.  Combine the beans and the salsa.  taste and adjust the seasoning, adding more salt, pepper, or salsa as needed.
     To serve, transfer the hot rice to a large serving platter or individual plates.  Spoon the beans over the rice.  Top with the roasted vegetables.  Pass the sour cream at the table.

Saturday, March 19, 2011

Fast Fresh Friday: Crisp-Tender Broccoflower with Lemon-Dijon Pan Sauce and Toasted Parmigiano Bread Crumbs over Angel Hair Pasta

The recipes in Fast, Fresh & Green really live up to the name.  Tonight I made Crisp-Tender Broccoflower with Lemon-Dijon Pan Sauce, and took Susie's suggestion to serve it over angel hair pasta tossed in brown butter.  Aren't you just drooling?

Seriously, this dish took me maybe 35 minutes to put together, which was great since Paul and I had an event to attend tonight.  My longest wait was for the pasta water to boil!

Unfortunately, I couldn't find any broccoflower so I substituted with cauliflower.  It was good, but not as pretty as the broccoflower I'm sure.  This was really a lovely dish.  Simple, tasty, and enjoyed by everyone.  I look forward to making it again!

Fast, Fresh & GreenCrisp-Tender Broccoflower with Lemon-Dijon Pan Sauce with Toasted Parmigiano Bread Crumbs
Fast, Fresh & Green
Yield:  4 servings


1 tbsp extra virgin olive oil
1 1/2 tbsp unsalted butter
10 oz Broccoflower florets (or 12 oz Cauliflower florets)
1/2 tsp Kosher salt
1/3 cup low sodium chicken broth (I used vegetable broth)
1 1/2 tsp fresh lemon juice
1 tsp Dijon mustard
1 tsp chopped fresh parsley
Toasted Parmigiano Bread Crumbs (see below)

In a 10 inch saute pan with a lid, heat the olive oil and 1 tbsp of the butter over medium high heat.  When the butter has melted and is starting to foam, add the broccoflower and salt and toss with tongs to coat.  Arrange the broccoflower with one cut side down and cook without stirring until the bottoms are browned, 3 to 4 minutes.  (The browning will be spotty but will be a fairly dark brown color.)  Turn the florets onto another side and cook again without stirring until that side is lightly browned in spots, about 2 minutes.  Carefully pour the broth into the pan (it will sputter), cover, and cook until all but 1 or 2 tbsp of the liquid has evaporated (uncover once or twice and swirl the liquid to distribute if necessary), 2 to 3 minutes.
     Remove the pan from the heat, uncover, and add the lemon juice, mustard, and the remaining 1/2 tbsp butter.  Stir well with a silicone spatula as the butter melts and the sauce becomes creamy.  Toss in the parsley, stir, and transfer the vegetables and sauce to a serving platter or dinner plates.  Garnish with the Toasted Parmigiano Bread Crumbs, if desired.  (You may not need all of them.  Add them immediately before serving to keep them crisp.)

Toasted Parmigiano Bread Crumbs


1/2 tbsp unsalted butter
1/4 cup fresh bread crumbs
Kosher salt
1 tbsp finely grated Parmigiano Reggiano
1 tsp chopped fresh parsley

Tuesday, March 15, 2011

Winter-Vegetable Beef Stew

The wind is fierce, and it's rainy and cold.  Seems like a perfect day to make stew!  So tonight I'm making Winter-Vegetable Beef Stew from Recipes from the Root Cellar, and Peasant Loaf from Artisan Bread in Five Minutes a Day.  Tonight I'll be meeting with my book club, so I'll have to wait until tomorrow to hear Paul's opinion.  Judging from the smells coming from the kitchen I think he's going to enjoy tonight's meal.

Paul and I love the big crusty loaves of artisan bread, but hate the high cost.  Artisan Bread in Five Minutes a Day seemed promising, so I ordered the book.  I've mostly made the Boule (French for ball, it's a round white bread), and European Peasant Bread (a round whole grain country style loaf) but there are  lots of recipes for other types of bread as well as pizzas, and pastries.  The recipes are easily halved or doubled, and it's wonderful to be able to grab a bit of dough and in 35 minutes have a nice crusty, warm, and tasty piece of bread.  I think this is the perfect bread to dunk in a thick soup or stew.

I don't use the pizza peel or the baking stone.  I just can't seem to get the bread dough from the peel to the stone, so I would have to pick up the dough and quickly toss it on the stone.  It's easier just to use my Air Bake pizza pan.  I dust the pan with a little cornmeal, mold the dough, set it on the pan, and 40 minutes later it's in the oven to bake!

For the meat in the stew I used chuck, a preference I'm sure I picked up from my dad.  He loved chuck steak -- thought it was the tastiest meat on the cow.

Now I know when cooking with wine you're supposed to use the wine you prefer to drink, but I like to use those mini bottles of wine.  Bella Sera is the brand I prefer, and for the stew I used their Merlot.

Halfway through cooking the onions I stirred in the herbs and garlic  I like to saute herbs and garlic for a few minutes before I add liquids to the dish.  I think it helps bring out the oils in the herbs, and sweetens the garlic flavor.  

Recipes from the Root Cellar: 270 Fresh Ways to Enjoy Winter VegetablesWinter-Vegetable Beef Stew
Recipes from the Root Cellar
Yield:  Serves 6

2/3 cup unbleached all-purpose flour
1 tbsp dried thyme
1 tsp dried oregano
Salt and freshly ground black pepper
2 pounds stew beef (chuck or round), cut into bite-size pieces
1/4 cup extra virgin olive oil
1 large onion, thinly sliced
1 1/2 cups beef broth
2 cups diced tomatoes with juice, or one 15 oz can
1 cup red wine
2 garlic cloves, minced
1 1/2 pounds thin-skinned potatoes, peeled and cut into 1 inch cubes
1 pound carrots, peeled and cut into 1 inch cubes
1 pound parsnips, peeled and cut into 1 inch cubes
1 pound rutabagas or turnips, peeled and cut into 1 inch cubes

     Combine the flour, 1 tsp of the thyme, and the oregano in a shallow bowl.  Season generously with salt and pepper.  Add the beef and toss to coat.
     Heat 3 tbsp of the oil over medium heat in a large saucepan or Dutch oven.  Lift the beef pieces out of the flour, shaking off the excess, and add a single layer of meat to the pan.  Do not crowd the pan.  Cook, turning as needed, until browned, about 5 minutes.  Remove the meat as it browns and set aside.  Continue browning the remaining meat.
     Add the remaining 1 tbsp oil and the onion to the pan and saute until the onion is soft, about 3 minutes.  Add the broth, tomatoes, wine, and garlic, and the remaining 2 tsp of thyme.  Stir to scrape up any browned bits from the bottom of the pan.  Bring to a boil, then reduce the heat to a slow simmer.  Return the meat to the pan.  Partially cover the pan and simmer until the meat is tender, about 2 hours.
     Add the potatoes, carrots, parsnips, and rutabagas to the pan and simmer until the vegetables are tender, about 1 hour.
     Taste and season with salt and pepper.  Serve hot.

Artisan Bread in Five Minutes a Day: The Discovery That Revolutionizes Home BakingPeasant Loaf Bread
Artisan Bread in Five Minutes a Day
Yield:  4 One Pound Loaves

3 cups lukewarm water
1 1/2 tbsp granulated yeast (2 packets)
1 1/2 tbsp Kosher salt
1/2 cup rye flour
1/2 cup whole wheat flour
5 1/2 cups unbleached all-purpose flour
Cornmeal for the pizza peel.

     Mixing and storing the door:  Mix the yeast and salt with the water in a 5-quart bowl, or a lidded (not airtight) food container.
     Mix in the remaining dry ingredients without kneading, using a spoon, a 14 cup capacity food process (with dough attachment), or a heavy duty stand mixer (with dough hook).  If you're not using a machine, you may need to use wet hands to incorporate the last bit of flour.
     Cover (not airtight), and allow to rest at room temperature until the dough rises and collapses (or flattens on top), approximately 2 hours.
     The dough can be used immediately after the initial rise, though it is easier to handle when cold.  Refrigerate in a lidded (not airtight) container and use over the next 14 days.
     On baking day, dust the surface of the refrigerated dough with flour and cut off a 1-pound (grapefruit size) piece.  Dust with more flour and quickly shape it into a ball by stretching the surface of the dough around to the bottom on all four sides, rotating the ball a quarter turn as you go.  Allow to rest and rise on a cornmeal-covered pizza peal for 40  minutes.
     Twenty minutes before baking time, preheat the oven to 450, with a baking stone (if using) placed on the middle rack.  Place an empty broiler tray on any other shelf that won't interfere with the rising bread.
     Sprinkle the loaf liberally with flour and slash a cross, "scallop", or tic-tac-toe pattern into the top, using a serrated bread knife.  Leave the flour in place for baking; tap some of it off before slicing.
     Slide the loaf directly onto the hot stone.  Pour 1 cup of hot tap water into the broiler tray, and quickly close the oven door.  Bake for about 35 minutes, or until the top crust is deeply browned and very firm.  Smaller or larger loaves will require adjustments in baking time.
     Allow to cool before slicing or eating.

Wednesday and Thursday Paul and I will be eating out.  My next blog will be for Fast Fresh Friday:  Crisp-Tender Broccoflower with Lemon-Dijon Pan Sauce and Toasted Parmigiano Bread Crumbs over Angel Hair Pasta. Whew!  That was a long title!

Monday, March 14, 2011

Meatless Monday: Mujdhara

Muja-what?  Come on...I know you were scratching your head on this one!

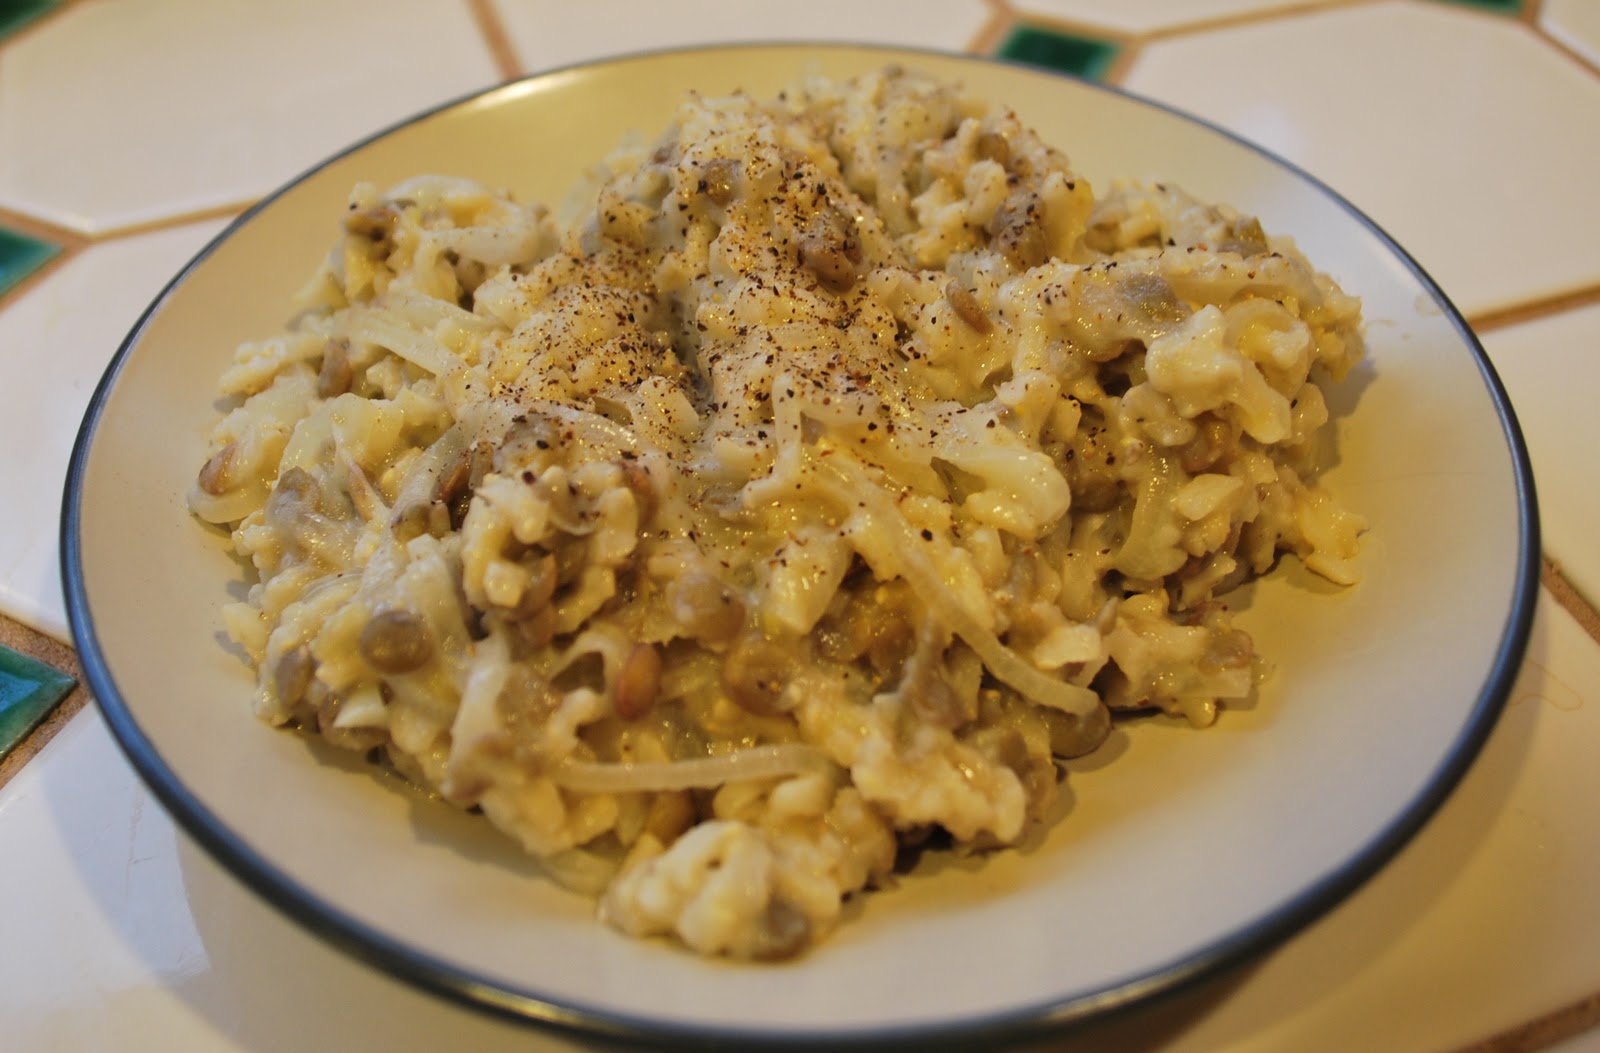
Mujdhara (according to Recipes from the Root Cellar) is a Syrian rice and lentil classic dish that has as many variations as it has spellings including:  mjudra, mujadra, and mejadra.  Among Jewish communities in the Middle East, the dish is sometimes nicknamed "Esau's Favorite", after the Biblical story in which Esau sold his birthright for a "mess of pottage".  It is that good.

Maybe in Biblical times it was "that good", but today if Esau told me he sold his birthright for some of this Mujdhara I would have asked him if he lost his mind.  The dish is just bland.  Bland, bland, bland!  I cooked the onions longer than 10 minutes so they would be soft and sweet, and they supplied the only taste to the "pottage".  There is a nice creamy, nutty, lingering on the tongue after you've eaten a bite but even that is not enough to save the dish.  If you think I'm being a bit harsh let me add that even Paul didn't like it!  He said it was really bland, and went to put some salt on it.  When I asked if he liked it better after adding salt he said, yes.  Then he looked a little sheepish, and confessed that he actually put soy sauce on it.

I just figured out what it reminds me of.  When I was a child and my stomach was upset my mom would make me very soft soupy rice (almost a porridge).  As an adult I can't stand the stuff, but as a child I thought it was wonderful.  Maybe that's the appeal of this dish?  Sort of a childhood dish you have a nice memory of?  I don't know.  I'm just happy I decided to halve the recipe since it's only Paul and I for dinner tonight.

Mujdhara
Recipes from the Root Cellar
Yield:  Serves 4

1 cup dried green or brown lentils, rinsed
1 tsp salt, plus more as needed
1 1/2 cups brown rice
3 tbsp extra-virgin olive oil
3 large onions, halved and thinly sliced
4 garlic cloves, minced
1 1/4 cups buttermilk
Freshly ground black pepper

     In a medium saucepan, cover the lentils with water by about 3 inches and add 1/2 teaspoon salt.  Bring to a boil, then reduce the heat and boil gently, partially covered, until the lentils are tneder but still hold their shpae, about 25 minutes.  Drain and rinse the lentiles with hot water.
     Meanwhile, combine the rice, 1/2 teaspoon salt, and 3 1/4 cups water.  Bring to a boil, then reduce the heat and simmer, covered, until the rice is tender and the water absorbed, about 30 minutes.
     While the rice and lentils cook, heat the oil over medium-low heat in a large saucepan.  Add the onions, and garlic and cook, stirring frequently, until golden, about 10 minutes.
     Add the cooked lentils and rice to the onions.  Add the buttermilk to moisten and bind the mixture.  Season to taste with salt and pepper.  Serve warm or at room temperature.

Variation:  For an interesting variation, substitute cooked wheat berries for the rice.

Sunday, March 13, 2011

Cooks from Books...and the Internet!

The internet is a wonderful cooking tool.  If I'm stuck for something to make for dinner all I have to do is Google some ingredients, and ta-dah!  Recipes!  

One day I was trying to use up some sausage, and I found this recipe on About.com: Southern Food which I've modified over time, but you can find the original recipe here.  Unfortunately, I didn't have any tomatoes on-hand so I omitted them, which I would strongly advise against.  The tomatoes add a wonderful acid component to this very rich, cheesy dish.

I like to make the cheese sauce in my 5 quart enameled cast iron Dutch Oven.  If you don't have one then use a large saucepan, and combine the finished cheese sauce with the cooked macaroni, and pour into a greased 3 quart casserole dish for baking.

Also, I like to heat the milk before adding to the pot.  I put it in my microwave for about 5 minutes at half power -- just long enough to warm the milk (be careful not to boil the milk).  This really helps speed up the sauce making process.  

My friend, Jennevieve, told me about Di Martino Fusillata, an imported dried pasta she found at Metropolitan Market (an upscale grocery store in our area) which sells for almost $2.50 a pound.  Now usually I wait until pasta goes on sale for $1/package, but she said this was the best pasta -- how could I not try it?  Jennevieve was right.  This pasta is worth the extra money.  It has a firm texture that stands up to a pretty thick and chunky sauce.  I think it will be my go-to pasta for my baked pasta dishes.  

Macaroni and Cheese with Sausage
adapted from About.com: Southern Food
Yield:  Serves 6 to 8

1 pound macaroni (I like to use Cavatappi)
1 tbsp olive oil
1/2 Hillshire Farms Beef Polska Kielbasa, chopped
1/2 red bell pepper, chopped
1/2 green bell pepper, chopped
1 medium onion, chopped
1/2 tsp red pepper flakes
1/4 tsp ground black pepper
2 garlic cloves, minced
3 cups milk (I use 2%)
2 cups (8 oz) medium cheddar cheese, shredded
1 cup (4 oz) sharp cheddar cheese, shredded
salt to taste
8 ounces grape tomatoes, halved or quartered lengthwise
1/2 cup fine soft bread crumbs
1 tbsp melted butter

Cook macaroni in boiling salted water following package directions.  Preheat the oven to 350. 

Meanwhile, in an enameled cast iron Dutch Oven heat the olive oil over medium heat.  Add the kielbasa and onions, and cook about 10 minutes, stirring occasionally.  Add the bell peppers, garlic, black pepper, red pepper flakes, and cook until peppers are soft, about 5 minutes. 

Stir in the flour until blended.  Gradually stir in the milk, and continue to cooking stirring constantly until thickened.  Remove from heat, and stir in the cheese and salt to taste.  Fold in the drained macaroni and tomatoes until blended.  Combine the bread crumbs with melted butter and sprinkle over the casserole.  Bake for 25 minutes.  Increase heat to 400, and bake for 5 to 10 minutes longer until crumb topping is lightly browned.